


Honda Odyssey Taillights
If the taillights on the Honda Odyssey stop working, you should consider a replacement kit as soon as possible as taillights are crucial to your vehicle’s safety on the road. If you’re looking to replace your Honda Odyssey taillights with some OEM or aftermarket parts, here are some things to consider.
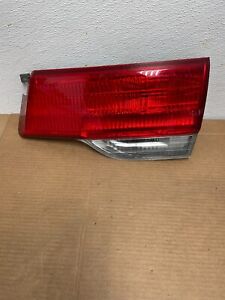
How do you replace a Honda Odyssey taillight?If one bulb is not working on your Honda Odyssey taillight, it probably just needs replacing. To change it out, you will need a flathead and a Phillips screwdriver, plus a towel.
- Open the back hatch. There are two plastic cover tabs on the side of the taillight on your Honda. Ease the flathead screwdriver underneath each tab and gently pop them off. Behind the tabs are screws. Remove them. A plastic pin holds the fixture in place, which is lodged towards the front portion on the side of the vehicle. First, attempt to rock it out of the pin. If it will not release, ease the flathead between the vehicle and light, placing a towel between the two to protect the pain. Apply gentle pressure. The fixture should pop off the pin.
- There will be wire connectors behind the taillight. Locate the wire connected to the dead bulb and twist the connector out; the bulb should be on the end of it. Pull it off and replace. Try not to touch the glass part as oils can degrade and shorten its lifespan. Wear latex gloves or try to handle the bottom of it. Test the lamp. If it works, twist the connector in, push the fixture back into place, screw down, and press back in place the plastic cover clips.
- If the light still does not work and you need to replace it, detach both wire connectors from the back of the taillight and reconnect to a new lamp. Push the new lamp back into the pin, screw in, and replace the plastic covers.
A blown fuse can be one reason the taillights will not turn on. The Honda Odyssey has three fuse boxes. One is located inside the vehicle on the driver’s side, right above the floorboard next to the brake, another on the passenger’s side, above the floorboard on the right side, and the third one is underneath the hood in the engine compartment. The covers easily slide off.
- On the inside of the covers are fuse diagrams, and the taillight fuse will be abbreviated ‘TL’. If the abbreviations are not clear, refer to the owner’s manual of your Honda Odyssey. Make sure you are replacing the correct fuse.
- The Odyssey comes with a tool to remove the fuses. It is white and sits inside the engine fuse box. Or, you can use needle-nose pliers. Locate the fuse, pull it out, and look at the center. If the wire is disconnected or blown, the fuse is bad.
- Before inserting a new fuse, make sure it is the same color and amps as the original fuse. Check with the owner’s manual of your Honda Odyssey because inserting the wrong fuse can cause damage to the vehicle.